Good to Know

Our Process and Schedule

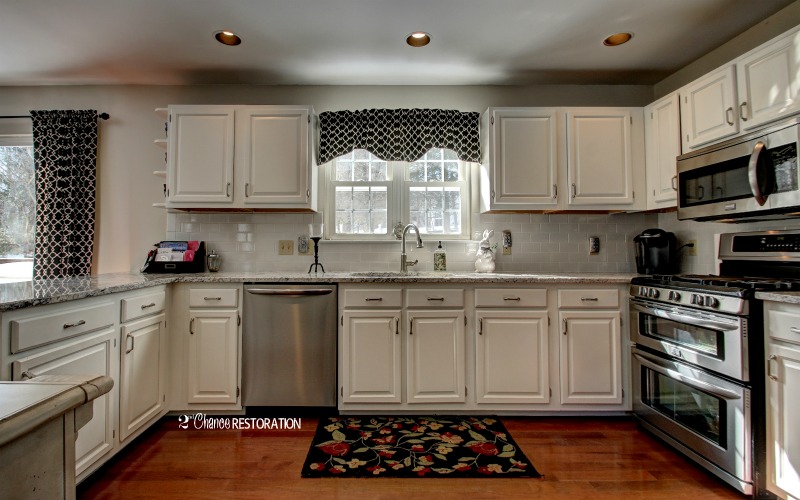
We are excited to get started on your project and transform your kitchen!

Prior to your scheduled Prep day, please refer to this checklist of items to be completed before we arrive:

  • This is a great time to clean out the cupboards! We ask you to please ensure we have the first 3-5” of space from the opening so that we can properly remove hardware and fit our drills without hitting your belongings.
  • Please remove any valuables from the cabinets and drawers such as china, money, jewelry etc.
  • If you have a glass cabinet area that will be having the interior space painted, please remove all of the items in that cabinet.
  • Completely clear off countertops.
  • Sweep the floor and remove any debris.
  • Remove garbage can and any rugs from the workspace that would be in our
    way.

    As a side note, please remember that all new door handles/pulls/knobs must be passed along to us on the Prep Day. Delays in our receiving the items will absolutely delay your project as we do not drill new holes on painted doors/drawers and it must be done prior to that.

Day One-Prep Day (usually 9:15-1:00)

  • All doors & drawers are numbered and removed to bring back to the studio.
  • All remaining cabinetry (bases, frames etc) will be cleaned, sanded, degreased, wiped, and vacuumed in place.
  • Crown moulding/base trim, corner seams etc will be caulked as needed.

Day Two (Monday-usually 9:15-1:00)
On this day, we prep the room taping off the interiors of the cabinets, walls, ceiling, and floor. You will want to take the time before we arrive to plan what food/dishes/glasses/small appliances/medications etc. that you’ll want to remove as we will be taping up all cabinet openings this day. (There will be no access by mid morning to the contents of your cabinets.)  Most clients create a mini kitchen area outside of the space with toaster oven, coffee pot, and paper plates/cups etc.
*You will still have access to the kitchen and all appliances after we leave this day, just not to any drawers or cabinets.

Day Three (Tuesday-usually 9:15-2:00)
*This is the big day* (Plan to make alternate meal plans for the evening) Appliances, and countertops are covered, and the room in general is closed off with plastic sheeting as it is Primer day! Two coats of Milesi industrial wood coating primer will be sprayed today with sanding, wiping and vacuuming between coats.

We will run ventilation and our air scrubber throughout the day which will help minimize odors and any ‘paint dust’. Typically we leave the air scrubber running after we leave and you are welcome to turn it off whenever you would like. *It is important that you not enter the cordoned off area as there is overspray on the floor at the end of the day, and opening the plastic will cause that to stir and land on your freshly primed cabinetry. Since you won’t have access to your kitchen now is the time to plan for grilling, take out or your favorite restaurant.

Day Four(Wednesday-usually 9:15-3:00)
This day would be the 2 coats of color with our Milesi industrial wood coating product and sanding in between coats. The goal would be by the end of the day we have broken down our setup of plastic, paper etc, and everything removed from the kitchen so you will have complete access to your kitchen again.  

*Optional Day Five
Any little touchups will be addressed optionally on this day as needed, and if possible, we like to re-install all of your drawers.

Final Day (Friday usually 9:15-12:30)
Today is Install Day when your doors will be reinstalled back into place and your transformation is complete!

Good to Know

Choosing new cabinet hardware

I’ve had this conversation quite a bit lately about selecting cabinet hardware, so thought I’d share some lessons learned with you.
 
1. There is no right or wrong about knobs versus handles. There is also no design standard about handles on doors and knobs on drawers…go with what you like! Personally, trying to find a knob and a handle in the same design, sheen, and color is too stressful so I usually recommend just pick one for everything.
 
2.If you go with a handle, make sure it has some depth to it. There’s nothing more awkward than not being able to fit your fingers behind a handle to open a door. For the ladies, you’ll end up chipping paint with your fingernails or rings if it’s too shallow as well. Buy one and test it first to make sure it’s comfortable.
 
3. Never ever ever ever ever ever buy square, or tube/bar shaped knobs! Can’t stress this one enough, especially if you have any type of OCD. Those little buggers will shift on you over time and start to not be straight…your eyes will be drawn to the tilt, you’ll start to twitch when you walk in the kitchen…it’ll be ugly. Trust me on this one 😂
 
4. When choosing a knob or handle, make sure that it does not over dominate the width rail of a door. If it takes up more than half the side, it’s an awkward look.
 
5. Avoid Ring pulls at all costs. They are beautiful, but forces your fingers to touch the cabinetry…anything you can do to avoid hand oils getting on your cabinetry is desired.
6. For efficiency, places like Home Depot, Lowes and Amazon are great, but there are other sites to check out too! Etsy is one of my favorites, also dlawlesshardware.com, doorcorner.com, knobs4less.com, amerock.com
Hope this helps, happy hunting!
~Kelly
Good to Know

How to Interview a Cabinet Painter

While the process of selecting a painter for your cabinet projects can feel daunting, here are some basic questions to ask when interviewing. Some of these are not a ‘Right or Wrong’ question, but more to make you stop and think about your preference (such as emptying cabinets). Please keep in mind that even though the word ‘painter’ is used in the blog subject line, we are NOT painters, we are Refinishers.  Our only focus is refinishing wood, not walls, not exteriors, etc…only wood furniture/cabinetry. We do continuous education every single week, work regularly on perfecting our process, and network with the pros and experts in the industry on a constant basis.

  1. Does the painter spray the doors, or are you alright with them brush painting the doors? (You should always insist on seeing a sample of their work to approve their technique.)
  2. Are you required to empty all your cabinets and drawers during the project?
  3. Do they paint the doors on site at your house taking up space in your home, or do they take them offsite?
  4. Is the painter insured in case something happens like a spilled gallon of paint on your new floors or carpet?
  5. Do they offer a one year free touch up service and a 3 year warranty on the paint?
  6. Do they use a 4 step prep process? (NO COMPROMISE HERE)
  7. What do they use for primer?  (If they tell you they don’t prime, RUN.)
  8. Do they use tried and true products with 10+ years of proven results, or are they using a trendy new product that just hit the market without a track record of endurance?
  9. Do they have a process to ensure the elimination and/or reduction of visible brush strokes? (Ask to see an example before committing)
  10. Do they know how to consult on what sheen to use, and are they well versed in the pros and cons?

Here are 2nd Chance Restoration’s answers to those questions:

  1. We spray the doors and drawers offsite, and can either spray OR brush the bases/frames (the part of the cabinet that is installed and stays at your house)
  2. We do not require emptying of cabinets and drawers. We tape off the cabinets from the inside, and we use a state of the art HEPA filtration sanding system that minimizes any sanding dust. You can rest assure that we clean each cabinet and countertop at the end of each work day of any dust that did result from the work.
  3. Doors and drawers are taken offsite. We treat each job the way that we would want it done and don’t set up long ladders and dropcloths in your home that are in your way during the projects and making a mess in your house. If a quote says that they do not remove the doors, this is a huge red flag! To properly get into all the nooks/crannies/crevices of your doors and your frames, the doors absolutely need to be removed. If a painter is cutting corners here, then there are other areas they are cutting corners too.
  4. We are insured and have a Home Improvement Contractor’s license in the State of Connecticut (HIC.0650532 )
  5.  We do!
  6. Every inch of your cabinets need to be cleaned,  sanded, vacuumed and degreased THOROUGHLY–we never compromise in creating the optimal environment for paint adhesion.
  7. We work primarily with two professional grade primers and choose based off of the wood (one that blocks out stains and tannins for example).  If a painter tells you the product they use does not require primer, this is just laziness and if they are cutting corners here, they will cut corners elsewhere too.
  8. We use products that are revered within the industry, are industrial wood coatings (not paint) with a proven track record and a solid reputation for endurance and durability. You will never find us using wall paint in your kitchen!
  9. We sand (and sand, and sand) between every coat to start the next coat off with the smoothest foundation and minimized brush or roller strokes.
  10. It’s simple to look around a home and see what the kitchen will be put through day to day and suggest the appropriate finish. We also pride ourselves on having the confidence to stand by our recommendations and comfortably explaining the pros and cons of  Low Gloss (my fave!), Satin, SemiGloss and HighGloss.

Happy Interviewing!

Good to Know

So you are starting a kitchen project…

When we get asked to provide a quote for kitchen cabinet refinishing, it inevitably turns out that there is more work happening in the space than just the cabinets.  Here’s a little post that walks you through the priorities of the work, when they should be scheduled, and why. Enjoy!

First Step-Flooring
If you’re doing your floors, that should come first in the project line up. It’s messy, it’s stinky, and you’ll more than likely need to leave your house for a few days.  I have yet to see a floor refinisher who did not inadvertently splatter stain on the wood trim or the cabinets, so we want to avoid that happening to fresh paint obviously.  We were once involved in a project where the floor refinisher’s tools scraped a 6″ swath of paint right off of the entire length of the cabinets. Thankfully we had not done our work yet!

Second Step-Countertops
Countertops are your main design element in the kitchen space. You  may have your heart set on creamy white kitchen cabinets with a dark countertop, only to head out countertop shopping and fall in love with a white Carrera marble that just won’t work with creamy white.  It’s an expensive part of the project and really should drive your other color choices in the room such as wall paint, cabinet paint, curtains, etc…  In addition, removal of the old countertop involves tools that could potentially damage or chip the paint of the cabinets. Sometimes there needs to be leveling and extra adhesive/caulking added to the countertop which could drip on to the cabinets, and removal of that drip will surely impact the cabinet paint.

Third Step-Backsplash
If you’re having a new backsplash installed, we always suggest doing this before the cabinet painting as well. It’s certainly not required like the previous two steps, but it sure does help pull in all the design aspects together before the painting begins.

Fourth Step-Painting of Walls
Like step 3, it’s not required, but strongly suggested before we walk in, primarily due to the fact that the painters like to use tape on the cabinets to have nice crisp lines and it gives me absolute nightmares thinking about tape going on freshly painted cabinets 🙂

Fifth Step-Cabinet Color Selection
After all that, the fun begins and we get to choose colors for your cabinets! We have the ability to obtain 8″x8″ color samples from the Benjamin Moore color collection and usually suggest that we get your choices down to 3-4 and order you 3 free samples of each of those colors to hang on your cabinets. This lets you see the comparisons, the different undertones, check the colors out during various times of day and different lighting.

Sixth Step-Hardware Selection
Once we have your color selection complete, we typically send our clients to dlawlesshardware.com to take a look at their knob/handle/pull selection. They have a tremendous variety of styles and choices at affordable rates. We are always happy to help narrow down your choices and make suggestions!  New hardware needs to be in your home one week before the project begins, especially if you are needing new holes drilled. (We outsource the drilling of the new holes and that needs to be done before we start.)

Phew! I know it’s a lot to process, but we hope this clears up the order (and reasoning!) for you as you head out on your kitchen restyling adventure  ~Kelly